A creative blog filled with crochet patterns, beginner-friendly tutorials, and a handful of delicious recipes.

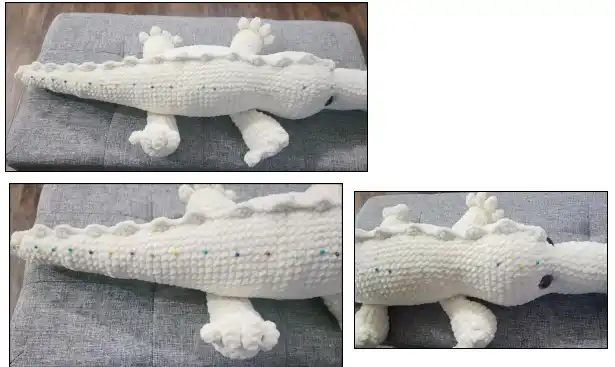
Alligator Crochet Pattern
Size:
21 inches from bottom to top of head with weight 6 yarn and a 3.75 mm hook
Skill Level Needed:
Intermediate- suitable for novice crocheters, requires patience and precisions when assembling the alligator and basic crochet skills.
Materials Needed:
Yarn: Worsted Weight #6, approximately 250g of main color and 100g of accent colors
Color A: Dark Green, Color B: Light Green
Hook Size: F hook or 3.75 mm
23 x 28 mm oval safety eyes
Scissors, sewing needle, stitch marker, fiberfill stuffing
Abbreviations:
mr= magic ring- crochet single crochet stitches in to the adjustable loop
BLO= back loops only
ch= chain stitch
F/O= Fasten off
sc= single crochet stitch
hdc= half double crochet
sl= slip stitch
FLO= front loops only
tr= triple crochet
dc= double crochet stitch
inc3= 3 sc in the same stitch
bob= bobble stitch
inc= increase- make two single crochet stitches in the same stitch
dec=decrease- crochet two stitches together using the decrease method
(4 sc, inc) x 6= repeat the pattern between parentheses 6 times
Notes:
- Do not join rounds unless stated, work in a continuous spiral
- Use a stitch marker to mark the beginning of each round
- All stitches are worked in both loops unless stated otherwise in the pattern
Head:
Crocheted from top of head to bottom of tail
With Color A:
Ch 5
- inc in 2nd ch from hook, 2 sc, inc3 in last chain, working on the opposite side of the chain: 3 sc, inc= 12
- (sc, inc) x 6= 18
- (2 sc, inc) x 6= 24
- (3 sc, inc) x 6= 30
- (4 sc, bob) x 2, 20 sc= 30
- sc in each st around
Stuff the head and body as you work
- (dec, 13 sc) x 2= 28
- (dec, 12 sc) x 2= 26
- (dec, 11 sc) x 2= 24
10-11. sc in each st around - (inc, 11 sc) x 2= 26
13-14. sc in each st around - (inc, 12 sc) x 2= 28
16-17. sc in each st around - (inc, 13 sc) x 2= 30
- sc in each st around
- (4 sc, inc) x 6= 36
- (5 sc, inc) x 6= 42
- (6 sc, inc) x 6= 48
Place eyes between rounds 19 and 20, leaving 9 holes between them. 1st eye is placed before the 2nd increase. Count 9 holes after the first eye and place the 2nd eye. (Make sure you line the eyes up with the nostrils on round 5) If you want the sunken eye look, do not place the backs of the eyes on until round 33.
TIP! You may have to adjust the eye placement depending on yarn and hook size you use.
23-26. sc in each st around
- (6 sc, dec) x 6= 42
28-29. sc in each st around - (5 sc, dec) x 6= 36
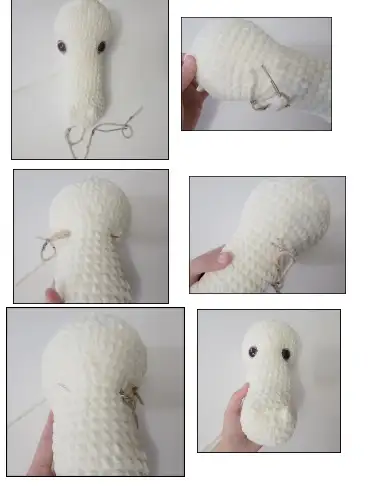
Now for the eyes. Stuff the head well. Cut a long piece of yarn and remove the eyes. Place the needle in the hole where the first eye was and thread the needle into a hole next to the eye hole. Go back and forth between each eye hole repeating the process from the first eye. Pull slightly on the yarn after going through each hole. Do this about 3 times on each side until you reach the look you want. Follow the pictures for help.
To place the backs of the eyes you will need to remove most of the stuffing to place the washers on the eyes then re stuff it.
Head and Body Continued:
31-34. sc in each st around
- (11 sc, inc) x 3= 39
- sc in each st around
- (12 sc, inc) x 3= 42
- sc in each st around
- (13 sc, inc) x 3= 45
- sc in each st around
- (14 sc, inc) x 3= 48
42-47. sc in each st around - (dec, 14 sc) x 3= 45
49-50. sc in each st around - (dec, 13 sc) x 3= 42
52-53. sc in each st around - (dec, 12 sc) x 3= 39
55-56. sc in each st around - (dec, 11 sc) x 3= 36
58-59. sc in each st around - (dec, 10 sc) x 3= 33
- (dec, 9 sc) x 3= 30
62-67. sc in each st around - (3 sc, dec) x 6= 24
69-73. sc in each st around - (2 sc, dec) x 6= 18
75-79. sc in each st around - (sc, dec) x 6= 12
81-85. sc in each st around - (2 sc, dec) x 3= 9
- sc in each st around
- (sc, dec) x 3= 6
F/O and sew the hole closed
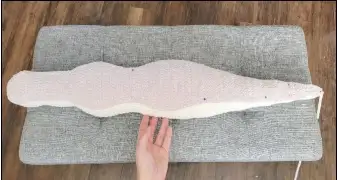
Belly:
With Color B:
Ch 9
- sc in 2nd ch from hook and across= 8
70-75. Ch 1, turn, sc in each st across - Ch 1, turn, inc, 6 sc, inc= 10
- Ch 1, turn, dec, 4 sc, dec= 6
- Ch 1, turn, inc, 8 sc, inc= 12
77-85. Ch 1, turn, sc in each st across - Ch 1, turn, sc in each st across
- Ch 1, turn, dec, 2 sc, dec= 4
- Ch 1, turn, dec, 8 sc, dec= 10
87-92. Ch 1, turn, sc in each st across - Ch 1, turn, dec, 6 sc, dec= 8
- Ch 1, turn, dec x 2= 2
7-20. Ch 1, turn, sc in each st across
94-97. Ch 1, turn, sc in each st across
- Ch 1, turn, inc, 6 sc, inc= 10
Sc around the edges. Now you can - Ch 1, turn, inc, 8 sc, inc= 12
either fasten off a very very very
23-25. Ch 1, turn, sc in each st across
long tail or you can leave a short to
- Ch 1, turn, inc, 10 sc, inc= 14
medium long tail and use worsted - Ch 1, turn, inc, 12 sc, inc= 16
weight yarn to sew the belly onto
28-30. Ch 1, turn, sc in each st across
the body. I used worsted yarn due
- Ch 1, turn, dec, 12 sc, dec= 14
to the fact that chenille yarn is hard - Ch 1, turn, sc in each st across
to sew with. It shreds apart like - Ch 1, turn, dec, 10 sc, dec= 12
crazy. - Ch 1, turn, sc in each st across
- Ch 1, turn, dec, 8 sc, dec= 10
36-39. Ch 1, turn, sc in each st across - Ch 1, turn, inc, 8 sc, inc= 12
- Ch 1, turn, sc in each st across
- Ch 1, turn, inc, 10 sc, inc= 14
- Ch 1, turn, inc, 12 sc, inc= 16
- Ch 1, turn, sc in each st across
- Ch 1, turn, inc, 14 sc, inc= 18
- Ch 1, turn, inc, 16 sc, inc= 20
47-52. Ch 1, turn, sc in each st across - Ch 1, turn, dec, 16 sc, dec= 18
- Ch 1, turn, dec, 14 sc, dec= 16
55-56. Ch 1, turn, sc in each st across - Ch 1, turn, dec, 12 sc, dec= 14
58-59. Ch 1, turn, sc in each st across - Ch 1, turn, dec, 10 sc, dec= 12
61-63. Ch 1, turn, sc in each st across - Ch 1, turn, dec, 8 sc, dec= 10
65-68. Ch 1, turn, sc in each st across - Ch 1, turn, dec, 6 sc, dec= 8
Legs (Make 4):
With Color A:
- Make 8 sc into a magic ring= 8
- Increase in each st around= 16
- (sc, inc) x 8= 24
- sc, (ch 5, sc in 2nd ch from hook, hdc in next ch, dc in next ch, tr in next ch, skip next st on leg, sc in next st) x 4, 15 sc
- sc in each st around (you are crocheting in the skipped stitches of the previous round, stitch 2, 4, 6, 8)
- (dec, 10 sc) x 2= 22
Start stuffing the legs
- (dec, 9 sc) x 2= 20
- (dec, 8 sc) x 2= 18
Stop stuffing the legs
- (dec, 7 sc) x 2= 16
- (dec, 6 sc) x 2= 14
- (dec, 5 sc) x 2= 12
- sc in each st around
Fold the legs in half and sc the opening closed. F/O and leave a long tail for sewing
Assembly
Belly:
- Turn the body upside down and pin the belly onto it.
- Sew the belly onto the body
Legs:
- Pin the legs onto the side of the body above the belly.
- Sew the legs onto the body.
Spikes:
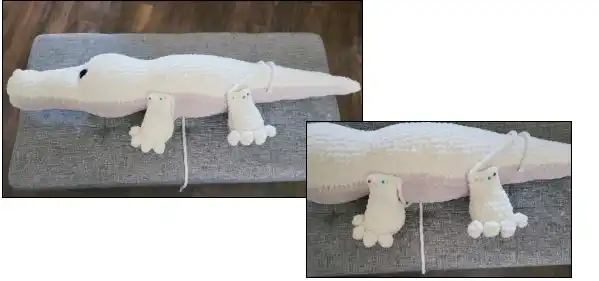
The pictures do not reflect exactly what I am saying in the directions. I have the spikes going all the way to the eyes in the pictures. This was my first attempt and I ended up deciding not to make the spikes that far up his head. I ripped out a few stitches to make the spikes just to the top of the back after I had already finished.
- You can do the spikes one of many ways but here are two different ways.
You can surface stitch the spikes. Mark two lines with pins going from the tip of the tail to in between rounds 30 and 31.
Attach the yarn with a sl st starting at the tip of the tail and work 3 hdc into a stitch. Sl st in next 3 stitches. Repeat down the back.
Or….
You can make a chain. Lay it against the back of the body to know exactly how many chains you will need. Work 3 hdc in 2nd ch from hook, sl st in next 3 chains. Repeat down the chain. Sew the chain onto the body.