A creative blog filled with crochet patterns, beginner-friendly tutorials, and a handful of delicious recipes.

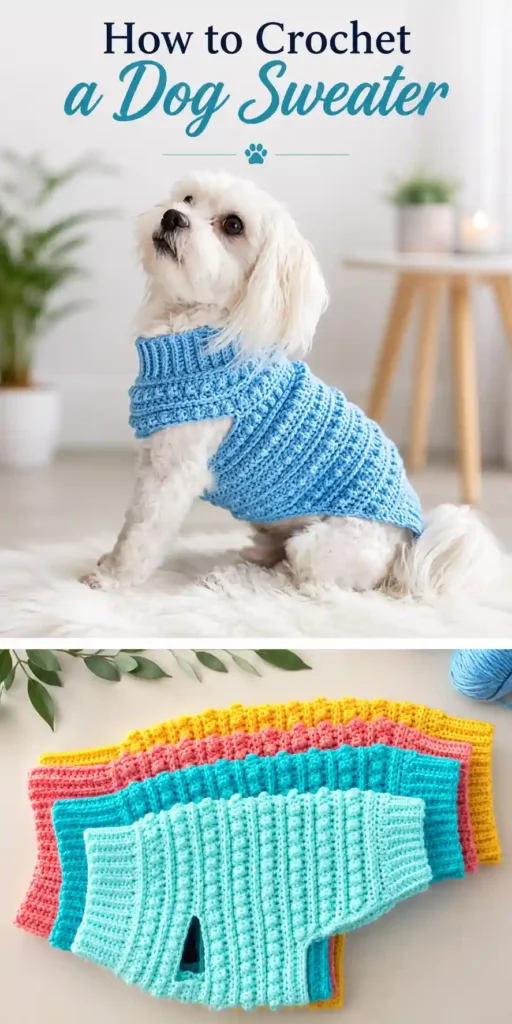
How to Crochet a Dog Sweater
If you’re looking for a cute, cozy, and affordable way to keep your dog warm, this crochet dog sweater is the perfect project. This pattern is beginner-friendly, stylish, and customizable for small to medium dogs.
In this tutorial, you’ll learn exactly how to crochet a ribbed dog sweater with a turtleneck, just like the one in the image.
Why You’ll Love This Crochet Dog Sweater
- Beginner-friendly pattern
- Uses basic stitches only
- Adjustable to fit any dog size
- Perfect for cold weather
- Great handmade gift idea
Materials You’ll Need
- Medium weight yarn (Category 4 – acrylic or cotton blend)
- Crochet hook (4.5 mm – 5.5 mm depending on tension)
- Scissors
- Yarn needle
- Measuring tape
Measurements (Very Important!)
Before starting, measure your dog:
- Neck circumference
- Chest circumference (widest part)
- Back length (from neck to tail base)
This pattern is customizable, so measurements matter more than fixed stitch counts.
Crochet Stitches Used
- Chain (ch)
- Slip stitch (sl st)
- Single crochet (sc)
- Half double crochet (hdc)
- Back loop only (blo) – for ribbed effect
Step 1: Crochet the Turtleneck Collar
Chain enough stitches to match the height of the collar (about 8–12 cm).
Row 1: Starting in the 2nd chain, make single crochet (sc) across.
Row 2+: Chain 1, turn, work sc in back loop only (blo) across.
Repeat rows until the strip fits snugly around your dog’s neck.
Join the ends with slip stitches to form a loop.
Step 2: Build the Body (Working in Rounds)
Now you’ll crochet around the collar:
- Evenly place half double crochets (hdc) around the collar edge.
- Join with a slip stitch.
Step 3: Create the Ribbed Body Texture
To get that beautiful ribbed look:
- Work hdc in back loop only (blo) in every round.
- Continue in rounds, increasing gradually to fit the chest.
Increasing Tip
Add 1–2 stitches evenly per round until it fits comfortably around your dog’s chest.
Step 4: Make Arm Holes
Once you reach the chest:
- Mark where the legs should go.
- Chain 2–4 stitches (depending on dog size) and skip stitches underneath.
- Continue the round.
This creates the arm openings.
Step 5: Continue the Body
- Keep working in rounds after the arm holes.
- Maintain the ribbed pattern (blo stitches).
- Stop when you reach the desired back length.
Step 6: Shape the Bottom (Optional)
For a better fit:
- Work shorter rows on the belly side.
- Keep the back slightly longer.
Step 7: Finishing Touches
- Fasten off and weave in all ends.
- Optionally add a border using single crochet around edges.
- You can also add buttons or decorations.
Tips for the Perfect Fit
- Always try the sweater on your dog as you go.
- Make sure it’s snug but not tight.
- Stretchy stitches help with comfort.
Customization Ideas
- Use different colors (pastel, neutral, bold).
- Add stripes or textures.
- Include a leash hole on the back.
- Make it sleeveless or add short sleeves.
Final Thoughts
This crochet dog sweater pattern is simple, stylish, and perfect for beginners. With just basic stitches and a little patience, you can create a cozy handmade outfit your dog will love.
Whether you’re crocheting for your own pet or selling handmade items, this project is a great addition to your crochet collection.