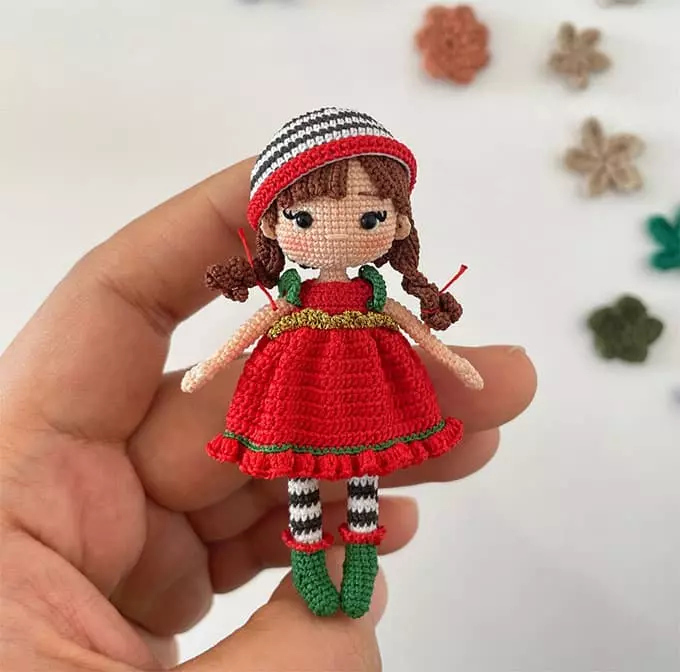
A creative blog filled with crochet patterns, beginner-friendly tutorials, and a handful of delicious recipes.
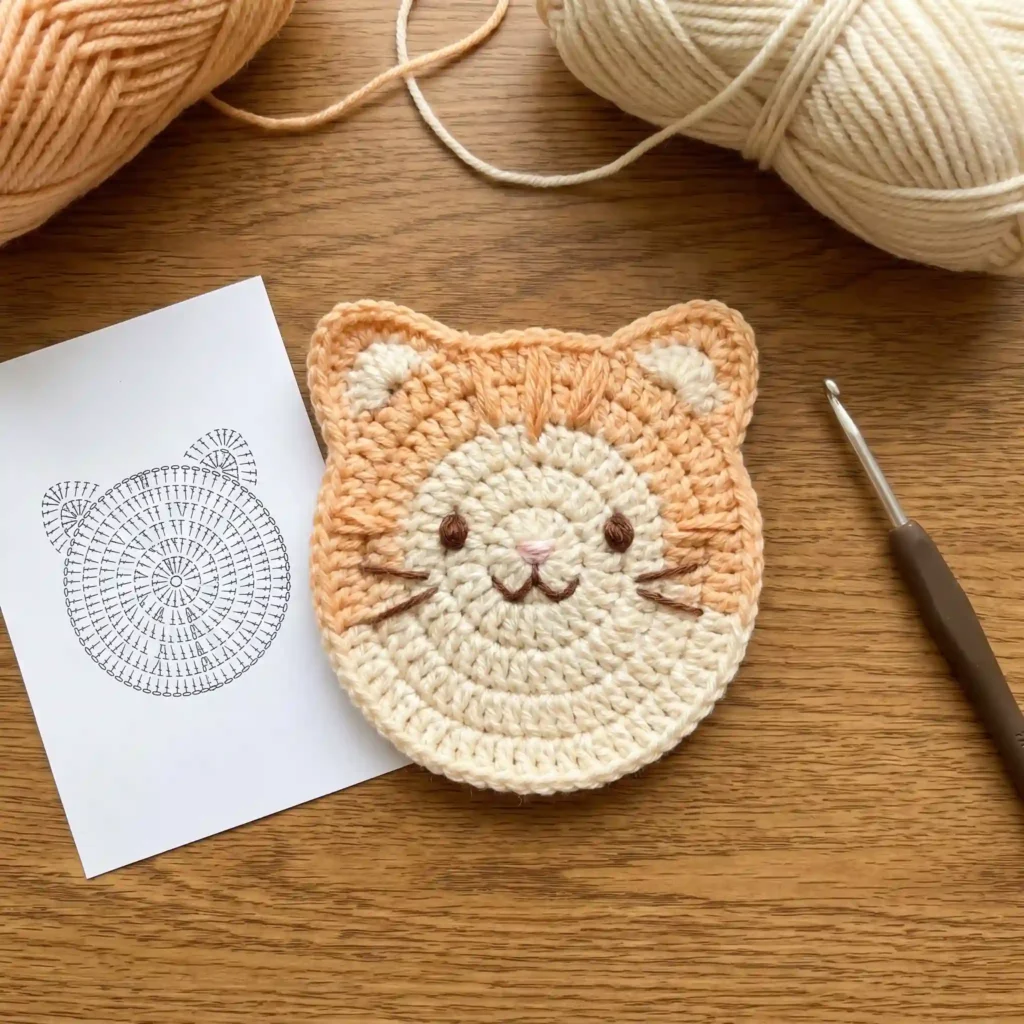
DIY Crochet Cat Coaster Pattern: Step-by-Step Tutorial with Reference Diagram
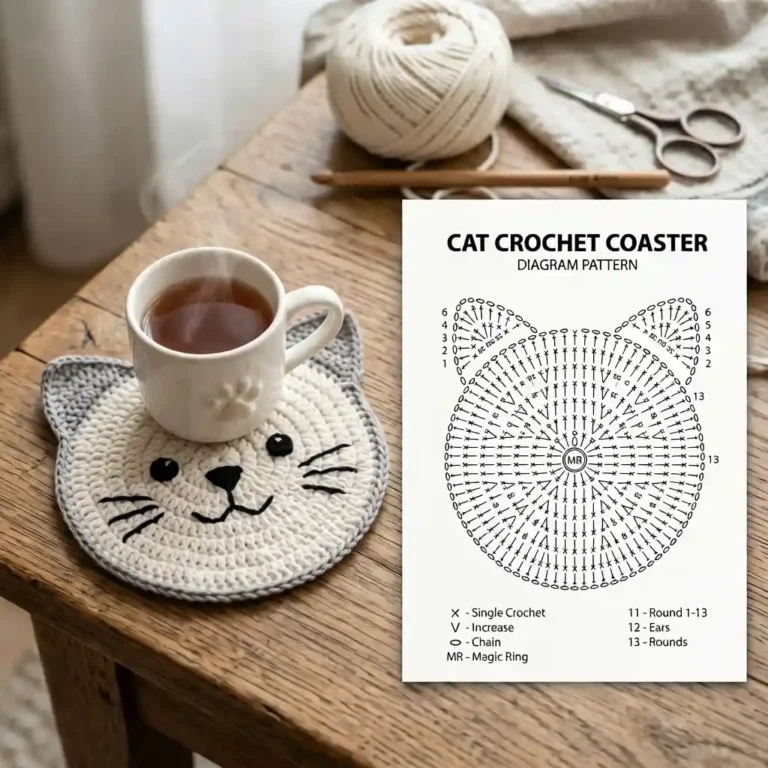
Create this adorable and functional crochet cat coaster with our detailed, step-by-step pattern! This tutorial includes a visual reference based on the generic diagram on the paper in the photo, and a simplified construction method to get the perfect cute tabby look of the finished product.
This beginner-to-intermediate level pattern is a perfect afternoon project and makes a fantastic gift for any cat lover.
Pattern Details:
- Skill Level: Beginner-Intermediate
- Time to Complete: 1-2 hours
- Finished Size: Approx. 4.5 inches (11.5 cm) in diameter (excluding ears)
Tools and Materials:
- Yarn: Small amounts of worsted weight (Aran or 4) yarn in two colors:
- Color A: Cream or light peach (for the lower face and inner ears)
- Color B: Orange or terracotta (for the upper face, ears, and border)
- Crochet Hook: 4.0 mm (US G/6) (or appropriate size to match your yarn weight)
- Tapestry Needle
- Scissors
- Embroidery Needle
- Embroidery Floss/Yarn:
- Dark Brown or Grey (for the mouth, whiskers, and eye dots)
- Pink (for the nose)
- Small amount of light cream/white felt or yarn (optional for inner ear patch)
Abbreviation Guide (US Terms):
- ch: Chain stitch
- sl st: Slip stitch
- sc: Single crochet
- hdc: Half-double crochet
- dc: Double crochet
- st(s): Stitch(es)
- inc: Increase (work 2 stitches into the same stitch)
- Magic Ring/Loop
Pattern Instructions:
We have simplified the construction to match the distinct color separation and shape of the finished coaster. Instead of one continuous round with complex color changes, this method involves creating the main face circle and a separate upper-head-and-ears piece, then stitching them together for a clean and neat look.
Part 1: The Cat Face Circle (Lower Face, Color A)
We use half-double crochet for the third round to make the face slightly flatter and match the image.
- Start: With Color A (cream/peach), create a Magic Ring.
- Round 1: Ch 3 (counts as 1 dc). Work 11 dc into the ring. Sl st to the 3rd ch. (12 dc)
- Round 2: Ch 3 (counts as 1 dc). Dc in same st. Work 2 dc in each st around. Sl st to the 3rd ch. (24 dc)
- Round 3: Ch 2 (counts as 1 hdc). Hdc in next st. Hdc in next st. Work 2 hdc inc in next st. [Hdc in next 2 sts, 2 hdc inc] repeat 7 more times. Sl st to the 2nd ch. (32 hdc)
- Round 4: (The final flat face edge) Work 1 sc into each hdc of the previous round, but work 1 extra sc in every 4th stitch (sc 3, inc 1) to keep the circle perfectly flat. Sl st. Fasten off.
Part 2: The Upper Head & Ears (Orange, Color B)
This piece is worked in rows to create the shaping for the crown and ears.
- Start: With Color B (orange), ch 12.
- Row 1: Sc in the 2nd ch from the hook and each ch across. Ch 1, turn. (11 sc)
- Row 2: Sc across. Ch 1, turn. (11 sc)
- Row 3 (Shaping for Crown and Ears): Sc 2.
- Ear Shaping (Ear 1 Point): In the next stitch, work [1 sc, 1 hdc, 1 sc] to form the point.
- Sc 3 across the “crown”.
- Ear Shaping (Ear 2 Point): In the next stitch, work [1 sc, 1 hdc, 1 sc] for the second point.
- Sc 2 to the end. Fasten off, leaving a long tail for sewing. (Total stitches on R2 worked into: 2+1+3+1+2=9. There will be 2 stitches left unworked on one side to match the width, which adds character).
Part 3: Assembly
- Stitch the Coaster Together: Using your tapestry needle and the long yarn tail from Part 2, neatly stitch the straight base of the orange upper-head piece to the straight top-center edge of the cream face circle. Fasten off and weave in all ends.
Part 4: Embroidering the Face Details (Based on the image)
This is where the magic happens! Use your embroidery needle and specific threads to add life to your cat.
- Eyes: Using dark brown/grey thread/yarn, make two simple, small dotted clusters at the level of Round 2. (Refer to the specific look in the photo for placement).
- Nose: Using pink thread/yarn, embroider a small horizontal bar just below the central magic ring.
- Mouth: Directly below the nose, create an inverted “V” using dark brown/grey thread, extending downwards. Add the central connecting line and dot for the typical cat expression. (Match the specific pattern in the photo).
- Whiskers: Using dark brown/grey thread, add the 3 main whisk lines on each side. Add the small dotted whisker above the main cluster (3 dots and a line). Look at the pattern on the coaster closely.
- Inner Ears: Using Color A (cream/peach) or a small piece of light cream felt, add a small, light-colored patch to the inner part of each ear for the final, adorable detail.
How to Read the Reference Diagram:
The diagram on the paper in the photo is a Russian-style spiral diagram with specialized symbols for cat head shaping. It is a fantastic guide for the continuous-construction method, but it is not directly used in this simplified two-part pattern (which results in the specific look shown on the finished coaster).
Here is what the symbols indicate:
- Central Dot: Magic Ring.
- Long Vertical Bars with Crosses: Double Crochet (dc).
- “V” Shapes (some with bars): Increase (inc) with the stitch indicated by the bar type (e.g., V with bars = dc inc; V with simple V = hdc inc).
- Special Ear Cluster Symbols: These indicate multi-stitch clusters (e.g., treble crochet cluster, chains, and treble cluster into one stitch) to form complex ear shapes. (Our simplified pattern has simplified these to clean points).
- Number of Rows: The diagram shows 4 complete rows of a standard flat circle, with ears integrated into the final row. (We recreated this look neatly with our two-part assembly).
Pattern Tips & Tricks:
- Keep It Flat: If your coaster starts to curl, add a few more increases in the outer rounds or use a slightly larger hook. The key is to match the number of increases of a flatter stitch, like using hdc.
- Color Variations: This pattern is perfect for making multi-colored cats! Try different tabby stripe patterns or use different base colors for different cat personalities.
- Share Your Creation: Pin this pattern to your Pinterest boards or share a photo of your finished cat coaster with the hashtag #CrochetCatCoaster!