A creative blog filled with crochet patterns, beginner-friendly tutorials, and a handful of delicious recipes.

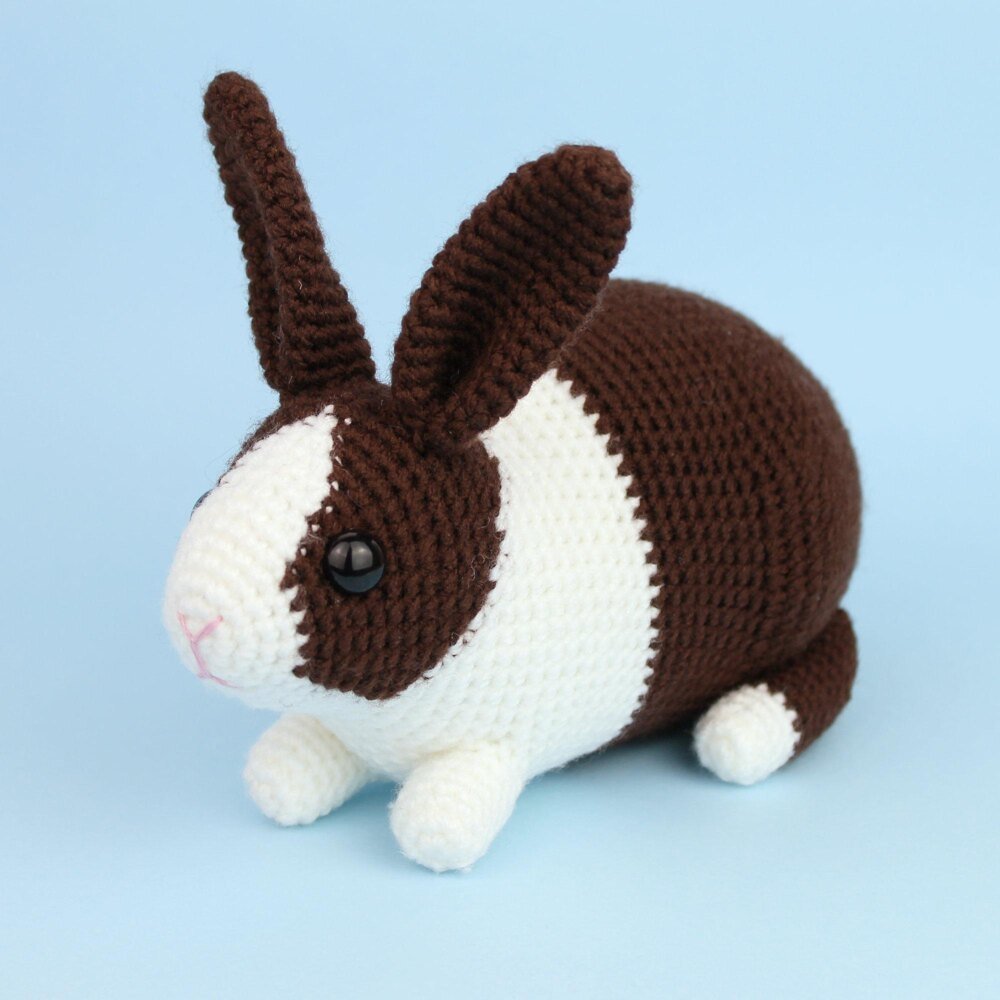
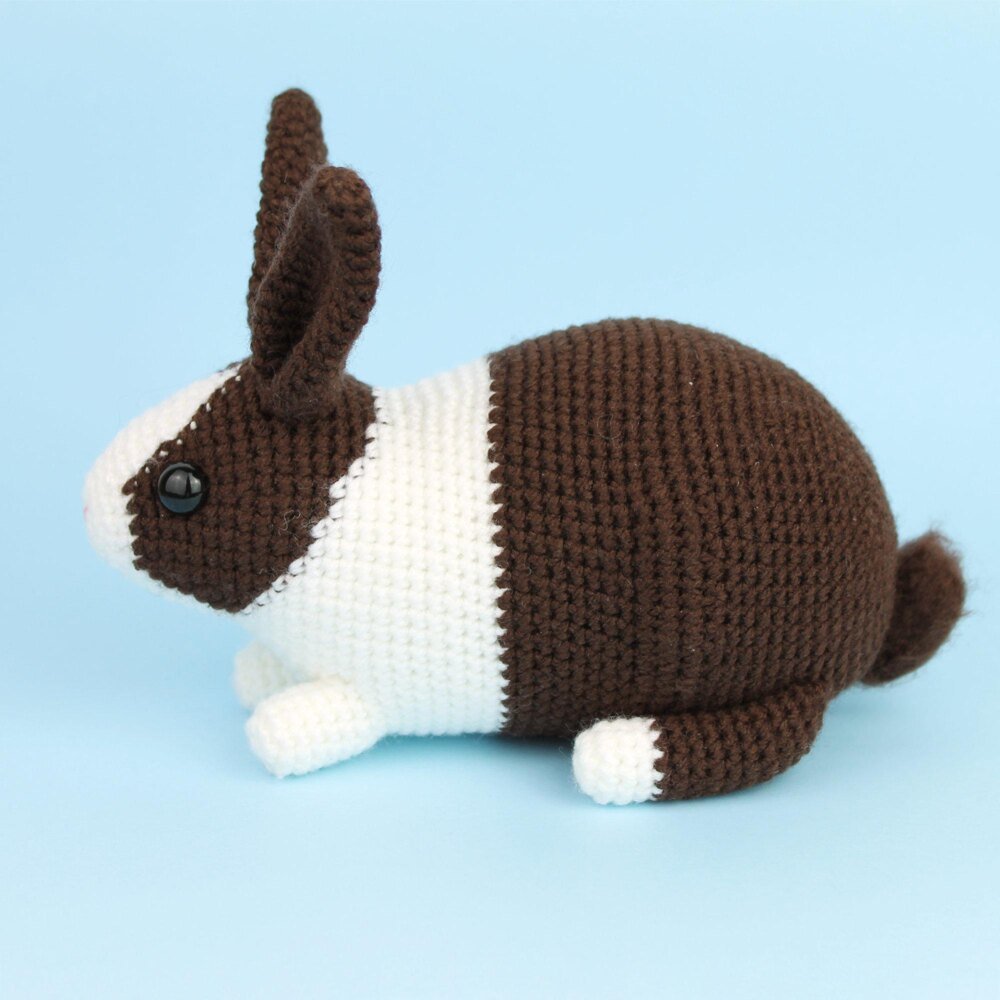
Free Crochet Masterclass: Realistic Bunny by Rioritta
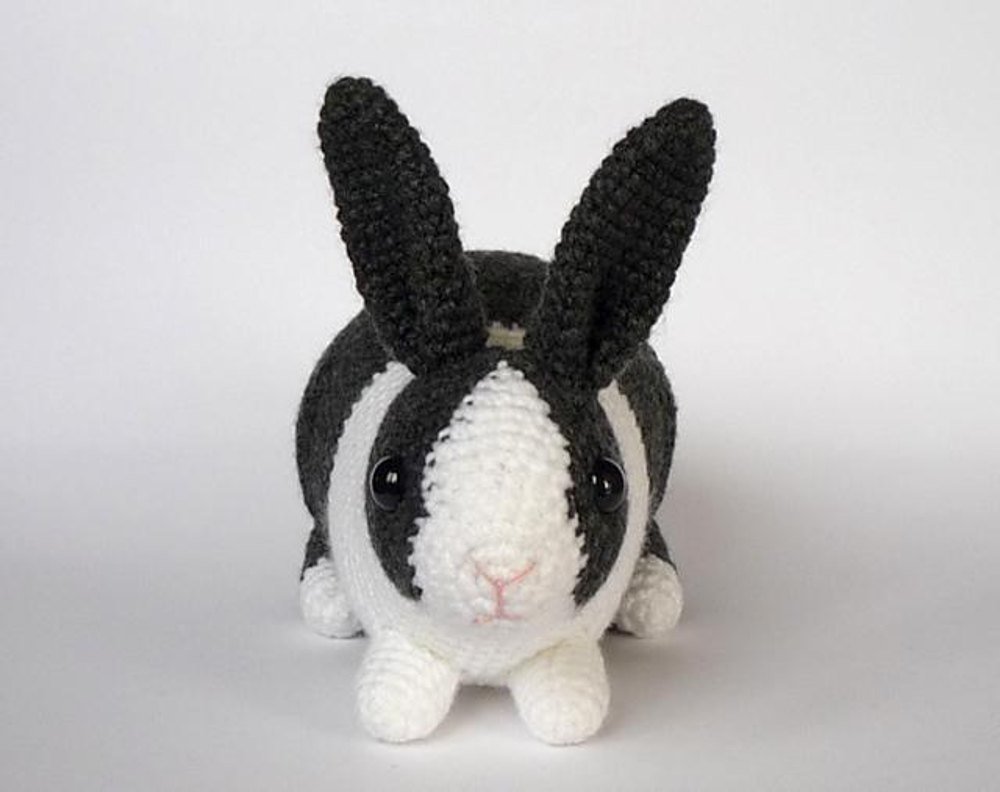
In this free crochet masterclass, you will learn how to create a realistic bunny crocheted on all four paws. This bunny is made with two colors of yarn (the pattern uses White and Black, but you can use other colors like brown or gray). All parts of the bunny are crocheted in spirals, and color changes are made without cutting the yarn.
Materials and Tools
- Any yarn in two colors: white and black (or any other color you prefer)
- Yarn for embroidering the nose
- Crochet hooks (appropriate size for your yarn)
- Safety eyes for toys (6 mm)
- Toy stuffing
- Stitch markers
- Needle for attaching parts
- Scissors
All materials can be purchased here.
Abbreviations
- KA — Magic ring
- вп — Chain stitch
- сс — Slip stitch
- сбн — Single crochet
- пр — Increase
- уб — Decrease
- (…) x n — Repeat n times
Crochet Instructions for the Amigurumi Bunny
Front Paws (Make 2)
White yarn
- Row 1: 6 single crochets in a magic ring (6)
- Row 2: 6 increases (12)
- Rows 3–7: 12 single crochets (12)
- Finish with a slip stitch. Cut the yarn and hide the end.
Head and Body
Start with white yarn
- Row 1: 6 single crochets in a magic ring (6)
- Row 2: 6 increases (12)
- Row 3: (1 single crochet, 1 increase) x 6 (18)
- Row 4: 18 single crochets (18)
- Row 5: (1 increase, 2 single crochets) x 6 (24)
- From this point, crochet the body using alternating colors.
- Row 6:
- White: 4 single crochets
- Black: 5 single crochets
- White: 7 single crochets
- Black: 5 single crochets
- White: 3 single crochets (24)
- Row 7:
- White: 1 increase, 3 single crochets
- Black: 1 increase, 3 single crochets, 1 increase
- White: 3 single crochets, 1 increase, 3 single crochets
- Black: 1 increase, 3 single crochets, 1 increase
- White: 3 single crochets (30)
- Row 8:
- White: 5 single crochets
- Black: 6 single crochets, 1 increase
- White: 1 decrease, 4 single crochets, 1 decrease
- Black: 1 increase, 6 single crochets
- White: 3 single crochets (30)
- Row 9:
- White: 5 single crochets
- Black: 8 single crochets
- White: 4 single crochets, 1 decrease
- Black: 1 increase, 6 single crochets, 1 increase
- White: 1 single crochet (30)
- Row 10:
- White: 1 increase, 4 single crochets
- Black: 1 increase, 4 single crochets, 1 increase, 3 single crochets
- White: 1 single crochet, 1 increase, 2 single crochets
- Black: 2 single crochets, 1 increase, 4 single crochets, 1 increase, 2 single crochets
- White: 2 single crochets (36)
- Continue in the same pattern for the following rows, alternating colors and increasing the stitch count.
Attaching the Front Paws
In Row 18, attach the front paws:
- White: 4 single crochets
- Attach the paw to the body with 4 single crochets on each paw, then continue crocheting only the body.
Continuing the Body
Continue crocheting the body until the desired size. The instructions will guide you through 20 more rows, using a mix of increases and single crochets to create the body’s shaping.
Ears (Make 2)
- Row 1: 6 single crochets in a magic ring (6)
- Row 2: (1 increase, 2 single crochets) x 2 (8)
- Row 3: (1 increase, 3 single crochets) x 2 (10)
- Row 4: (1 increase, 4 single crochets) x 2 (12)
- Row 5: 12 single crochets (12)
- Row 6: (1 increase, 5 single crochets) x 2 (14)
- Rows 7–8: 14 single crochets (14)
- Row 9: (1 increase, 6 single crochets) x 2 (16)
- Rows 10–11: 16 single crochets (16)
- Row 12: (1 increase, 7 single crochets) x 2 (18)
- Rows 13–17: 18 single crochets (18)
- Finish the ear by sewing the edges together. The ears are not stuffed. Attach the ears to the body.
Back Paws (Make 2)
Start with white yarn
- Row 1: 6 single crochets in a magic ring (6)
- Row 2: 6 increases (12)
- Rows 3–5: 12 single crochets (12)
- Switch to black yarn for the next rows.
- Rows 6–15: 12 single crochets (12)
- Row 16: 4 decreases (8)
- Finish the paws, leaving a long tail to sew them onto the body. Stuff the paws lightly and attach them to the sides of the bunny.
Tail
Start with black yarn
- Row 1: 6 single crochets in a magic ring (6)
- Row 2: 6 increases (12)
- Row 3: (1 increase, 3 single crochets) x 3 (15)
- Rows 4–7: 15 single crochets (15)
- Row 8: (1 decrease, 3 single crochets) x 3 (12)
- Row 9: (1 decrease, 1 single crochet) x 4 (8)
- Finish the tail by attaching it to the bunny’s back. Embroider the nose, and add the eyes (if you haven’t already done so).
Final Assembly
- Attach the front paws, back paws, ears, and tail to the body.
- Sew the facial features and make any final adjustments to the bunny’s posture for stability.
Your Realistic Bunny is Ready!
Congratulations! Your adorable crocheted bunny is now complete. Don’t forget to share your creation on social media, and feel free to tag the designer @Rioritta. Enjoy your handmade bunny!